I absolutely love finding new ways to bring life to old planters. It’s a wonderful craft that brings me so much joy.
This hobby is perfect for beginners and fun for both kids and adults. You can create something beautiful with simple supplies.

The porous surface of these containers makes them ideal for various art techniques. You can use paint, decoupage, or mixed media to make them unique.
These projects make excellent gifts or home decor items. I find myself brainstorming new designs every time I see them in stores.
I’ve gathered some brilliant inspiration to share with you. Let’s explore how to turn simple containers into beautiful works of art!
Key Takeaways
- This craft is perfect for beginners and enjoyable for all ages
- The porous surface accepts various art mediums beautifully
- You can find materials at most local stores year-round
- Finished pieces make wonderful gifts and home decorations
- Proper preparation ensures your designs last longer
- Both new and used containers can be transformed
- There are countless creative approaches to explore
Why I Love Transforming Terracotta Pots with Paint
My journey with painted planters began when I realized how expensive custom containers can be. As a new plant parent, I needed an affordable way to create beautiful homes for my growing collection.
This DIY approach lets me make unique designs that don’t look store-bought. I love how personalized they become with just some basic supplies and creativity.
Using inexpensive clay vessels and acrylic paints makes this project accessible to everyone. I typically avoid oil-based options since they’re messier and take longer to dry.
Proper preparation ensures my designs last for years. I always clean with a damp cloth and sometimes use spray primer for better durability.
The ombre technique creates a professional look that appears expensive. Blending colors from light to dark gives stunning results that impress everyone who sees them.
Sealing finished pieces protects them from weather and wear. This step is especially important for outdoor display in my garden area.
Sharing this passion with others brings me incredible joy. Seeing friends and Instagram followers create their own versions inspires me continuously.
This craft perfectly refreshes old containers with vibrant colors. It’s amazing what a difference some color and creativity can make!
Essential Supplies for Your Terracotta Pot Painting Project
Gathering the right materials makes all the difference in creating beautiful painted containers. I always start with a checklist to ensure I have everything before beginning.
Proper preparation saves time and frustration during the creative process. Having organized supplies lets me focus on the fun part – designing!

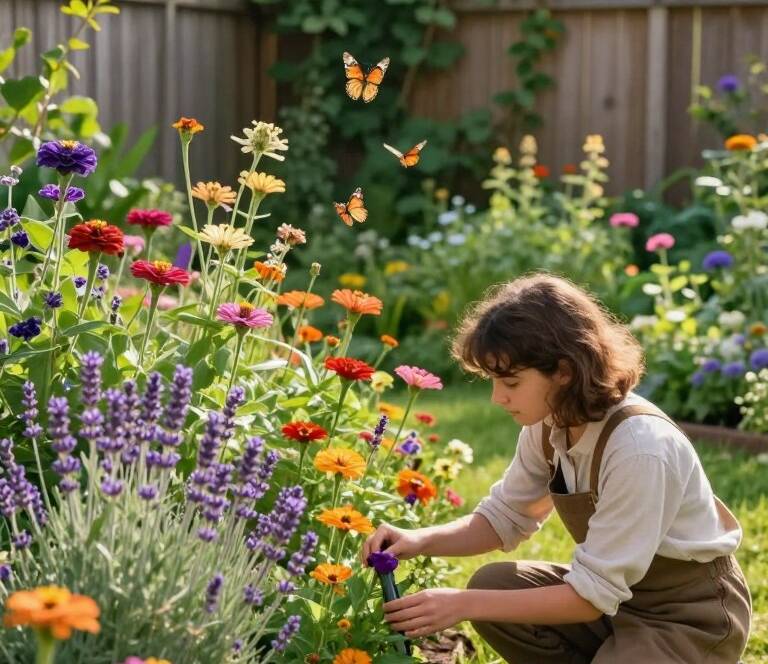
The foundation of any good project begins with quality containers. I recommend using vessels with drainage holes for healthy plant growth.
This allows proper water flow after your artistic transformation. Both new and used containers work wonderfully for this craft.
Brushes come in various sizes for different effects. I keep inexpensive options in multiple widths for detailed work and broad coverage.
Thinner brushes handle small areas and intricate patterns beautifully. Larger brushes cover big surfaces quickly and evenly.
Paint selection depends on where your finished piece will live. For outdoor displays, I choose weather-resistant options like FolkArt Outdoor paints.
These provide UV protection and withstand seasonal changes. Indoor pieces work well with premium acrylics like Delta Ceramcoat.
Sealant is crucial for protecting your artwork from moisture and wear. Spray versions offer quick coverage while brush-on types provide thicker protection.
I never skip this step for garden items that face rain and sun. It keeps colors vibrant and prevents peeling over time.
| Supply Type | Outdoor Use | Indoor Use | Kid-Friendly |
|---|---|---|---|
| Paint | FolkArt Outdoor | Apple Barrel | Washable acrylics |
| Brushes | Various sizes | Detail brushes | Short-handled |
| Sealant | Weatherproof spray | Brush-on poly | Non-toxic finish |
| Extras | Primer | Paint palettes | Paper plates |
Workspace protection keeps your area clean and stress-free. I lay down an old towel or drop cloth to catch drips and spills.
Optional supplies like primer add durability to your finished work. It creates a smooth surface for better paint adhesion.
When creating with children, I add some special items to the list. Washable paints, table covers, and paper plates make cleanup easier.
Sharpie markers let them personalize their creations with names or dates. These small touches make wonderful gifts for family members.
Having separate brushes for each color prevents muddy mixtures. This is especially important for techniques like color blending.
Water cups for rinsing keep your brushes working properly throughout the session. I change water frequently for clean color transitions.
Consider your project’s purpose when selecting materials. Outdoor pieces need durable supplies while decorative items can use more delicate options.
Vibrant colors and fun patterns make excellent presents for plant lovers. The right supplies ensure your creation lasts for years to come.
Preparing Your Pots: Cleaning and Priming Steps
Proper preparation makes all the difference between a lasting masterpiece and a disappointing project. I learned this through trial and error with my own creative endeavors.
New clay containers arrive unglazed and incredibly porous. This natural quality requires special attention before applying any decorative elements.

Sealing the interior prevents moisture from damaging your artwork. I use water-based acrylic sealers specifically designed for this purpose.
My favorite options include spray-on Clay Pot Sealer and brush-on FolkArt Outdoor Sealer. Both create effective barriers against water penetration.
Previously used containers need thorough cleaning before transformation. Dirt and salt residue can interfere with paint adhesion.
I scrub them with a wire brush to remove stubborn debris. For heavily soiled items, I follow a specific soaking process.
A solution of nine parts water to one part bleach works wonders. Soaking for twenty-four hours eliminates bacteria and stubborn stains.
After cleaning, thorough rinsing removes all chemical traces. I ensure no bleach residue remains before moving forward.
Complete drying is absolutely essential at this stage. Moisture trapped beneath sealant causes bubbling and peeling.
I wipe the exterior with a damp cloth for final surface preparation. This removes any remaining dust particles.
Consider using spray primer for additional durability. This step proves especially valuable for outdoor displays.
Apply primer to both interior and exterior surfaces. Complete coverage prevents water damage and extends your artwork’s life.
Allow each coat to dry completely between applications. Follow product instructions for optimal drying times.
Proper preparation ensures your creative efforts withstand time and elements. This foundation supports beautiful, lasting results.
| Container Type | Cleaning Method | Sealing Product | Drying Time |
|---|---|---|---|
| New Clay | Damp cloth wipe | Spray sealer | 2-4 hours |
| Used Planters | Bleach soak & scrub | Brush-on sealer | 24 hours |
| Heavy Stains | Wire brush & soak | Double coat sealer | 48 hours |
| Outdoor Use | Full cleaning & primer | Weatherproof sealant | Follow product guide |
This preparation process might seem time-consuming initially. However, it guarantees your finished piece maintains its beauty for years.
I always emphasize these steps in my DIY tutorials. Skipping preparation leads to disappointing outcomes regardless of design quality.
Children can participate in simpler preparation tasks with supervision. They enjoy helping with the cleaning and drying stages.
Well-prepared surfaces accept paint more evenly and vibrantly. Your colors will appear richer and more professional.
Remember that good foundations support incredible creativity. Your beautiful designs deserve this protective groundwork.
My Favorite Terracotta Pot Painting Ideas and Techniques
Exploring different creative approaches brings endless joy to my DIY projects. I love discovering new ways to transform simple containers into stunning pieces.
The ombre technique creates beautiful color transitions. I blend shades from light to dark using separate brushes for each hue.
Working while the paint is wet ensures smooth gradients. This method produces professional-looking results that always impress.

Stenciling offers precise designs for those who want clean patterns. I use adhesive stencils to create intricate details easily.
Decoupage with napkins or fabric adds wonderful texture. Mod Podge works perfectly for adhering these materials securely.
Stacking containers creates fun shapes like mushrooms or lighthouses. These make charming additions to any garden space.
Personalized pieces with photos make heartfelt gifts. I enjoy creating memory containers for special occasions.
Seasonal themes like Halloween bring festive cheer. Ghosts, pumpkins, and fairy gardens delight both kids and adults.
Children adore painting fruit designs and galaxy patterns. Bright acrylics and simple shapes keep them engaged happily.
Using various brush sizes achieves different effects. Large brushes cover backgrounds while small tips add fine details.
Applying base coats improves color coverage significantly. White or light backgrounds make vibrant shades pop beautifully.
Working in sections prevents quick drying issues. The porous surface absorbs moisture rapidly, so I paint strategically.
Allowing layers to dry completely avoids smudging. Patience during this step ensures crisp, clean results every time.
Mixed media elements add extra creativity. Glitter, ribbon, or washi tape provide delightful texture and dimension.
This versatile craft suits all skill levels wonderfully. From beginners to experts, everyone can create something special.
The possibilities are truly endless with these techniques. I constantly find new inspiration for my next project.
Sealing and Protecting Your Painted Masterpieces
Nothing completes a creative project like ensuring it stands the test of time. I’ve learned that proper protection transforms temporary crafts into lasting treasures.
The final sealing step makes all the difference for durability. It shields your artwork from moisture, sunlight, and daily wear.

Always apply sealant after your design dries completely. This prevents smudging and ensures optimal protection. I wait at least 24 hours before starting this process.
For indoor displays, I prefer clear spray sealants or brush-on polyacrylic. These options provide excellent protection without altering colors.
Outdoor pieces need tougher protection against weather elements. Exterior-grade sealants offer UV resistance and weatherproof qualities.
Rust-Oleum 2x Ultra Cover Gloss Clear is my top recommendation. It creates a durable, glossy finish that withstands outdoor conditions beautifully.
Apply sealant in a well-ventilated area for safety. I always work outside or in my garage with the door open.
Multiple thin coats work better than one thick application. Allow each layer to dry completely between applications.
Follow product instructions for specific drying times. Most sealants need 2-4 hours between coats.
For chalk paint finishes, use wax-based paste sealers. These protect while maintaining the paint’s matte appearance.
Some specialty paints have built-in sealers. Check product labels to avoid over-sealing.
Sealing the interior is crucial for plant containers. This prevents moisture from damaging your artwork from inside.
Allow sealed pieces to cure fully before use. Most need 48 hours to reach maximum durability.
This protection ensures your creations remain vibrant. They’ll withstand handling and environmental factors beautifully.
| Project Type | Recommended Sealant | Coats Needed | Curing Time |
|---|---|---|---|
| Indoor Decor | Clear Spray Sealant | 2-3 coats | 24 hours |
| Outdoor Garden | Weatherproof Sealant | 3-4 coats | 48 hours |
| Chalk Paint | Wax-Based Sealer | 2 coats | 24 hours |
| Kids’ Projects | Non-Toxic Sealer | 2 coats | 12 hours |
Well-sealed pieces make wonderful gifts that last for years. They’re durable enough for regular handling and outdoor display.
I always emphasize this final step in my tutorials. It transforms beautiful projects into practical, long-lasting pieces.
Share your protected creations proudly on social media. They’ll maintain their beauty through seasons and weather changes.
This attention to finishing details elevates your craft. Your sealed masterpieces will bring joy for many years to come.
Conclusion
I find immense satisfaction in transforming simple clay vessels into beautiful, personalized creations. This craft brings joy to every step of the process.
Whether you’re new to DIY or an experienced maker, there’s a design approach for everyone. From basic color washes to detailed decoupage, the possibilities are endless.
Proper preparation and sealing ensure your artwork lasts for years. This is especially important for outdoor use or functional plant containers.
This project works wonderfully for all ages. Kids especially enjoy choosing bright colors and patterns.
Your finished pieces make thoughtful gifts or charming garden additions. Share your creations online to inspire others in their crafting journey.
If you loved this tutorial, try other projects like dried flower arrangements or painted glass jars. Happy creating!